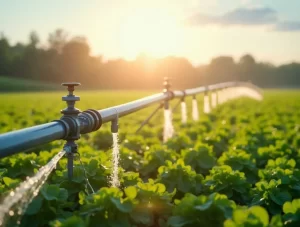
How to Install UPVC Pipe Fittings: A Step-by-Step Guide

Introduction

UPVC (Unplasticized Polyvinyl Chloride) pipe fittings are a popular choice for plumbing due to their durability, resistance to corrosion, and ease of installation. Whether you’re a DIY enthusiast or a professional plumber, understanding the correct method of installing these fittings is essential for ensuring a reliable and leak-proof plumbing system. In this step-by-step guide, we will walk you through the entire process of installing UPVC pipe fittings, making it simple and easy to follow.

Step-by-Step Guide to Installing UPVC Pipe Fittings

Follow this detailed step-by-step guide to install your UPVC pipe fittings efficiently:

Step 1: Measure and Mark the Pipe

  • Measure the Length: Use a tape measure to mark the desired length of the UPVC pipe.
  • Mark the Cut: Use a marker to mark where the pipe needs to be cut. Make sure to account for the extra length needed to fit inside the fittings.

Step 2: Cut the Pipe

  • Cut the Pipe: Use a UPVC pipe cutter or hacksaw to make a clean, straight cut. This ensures a secure fit with the fitting.
  • Deburr the Edges: Smooth the cut edges using a deburring tool or sandpaper to remove any burrs or sharp edges that could interfere with the fitting.

Step 3: Clean the Pipe and Fittings

  • Wipe the Pipe: Use a clean cloth to wipe down both the inside of the fitting and the outside of the pipe to remove dust, dirt, or grease.
  • Use Primer (Optional): Some UPVC fittings require the use of a primer to soften the pipe surface and enhance bonding. Apply primer if recommended by the manufacturer.

Step 4: Apply Solvent Cement

  • Brush on Cement: Using a brush or applicator, apply an even layer of UPVC solvent cement to both the outside of the pipe and the inside of the fitting.
  • Quick Application: Solvent cement dries quickly, so apply it evenly and be ready to connect the pipe and fitting immediately.

Step 5: Join the Pipe and Fitting

  • Insert the Pipe: Push the pipe into the fitting with a slight twisting motion to ensure even distribution of the cement.
  • Hold for 30 Seconds: Hold the pipe and fitting together for at least 30 seconds to allow the solvent cement to bond securely.

Step 6: Allow to Dry

  • Curing Time: Let the joint dry for at least 15-30 minutes before handling. Full curing takes about 24 hours, so avoid running water through the system until the cement has fully set.

Common Mistakes to Avoid

1. Uneven Cuts

Make sure the pipe is cut straight and clean. Uneven cuts can lead to poor alignment and leaks.

2. Skipping Deburring

Always deburr the pipe edges. Burrs can cause improper sealing between the pipe and fitting, leading to leaks.

3. Rushing the Cement Application

Solvent cement dries quickly, but it’s essential to ensure even coverage and correct positioning before it sets.

4. Not Allowing Sufficient Curing Time

Running water through the system before the cement fully cures can weaken the joint and cause leaks. Always follow the manufacturer’s curing time guidelines.

Tips for a Leak-Proof Installation

  • Use Quality Fittings: Invest in high-quality UPVC pipe fittings that fit well and are made from durable materials.
  • Apply Cement Evenly: Ensure that both the pipe and fitting are fully coated with solvent cement to prevent gaps and leaks.Hold the Joint Securely: After connecting the pipe and fitting, hold them together firmly for at least 30 seconds to ensure a strong bond.
  • Check Alignment: Make sure the pipe is aligned correctly with the fitting before the cement dries.

Manufacturing Process of CPVC Piping Systems

Market Demand for CPVC and UPVC Pipes in Various Sectors

The demand for CPVC and UPVC pipes is expected to rise across various industries in 2024 due to their strength, versatility, and environmental benefits.

1. Residential and Commercial Plumbing

As urbanization accelerates, the demand for durable, long-lasting pipes in residential and commercial plumbing systems continues to grow. CPVC and UPVC pipes are prized for their resistance to corrosion and chemicals, making them ideal for both hot and cold water distribution systems.

2. Industrial Applications

Industries such as chemical processing, oil and gas, and water treatment are increasingly using CPVC pipes due to their ability to handle harsh chemicals and extreme temperatures. Their non-corrosive properties extend the lifespan of piping systems in industrial environments.

3. Infrastructure Development

Government initiatives to improve public infrastructure, including water supply and sanitation systems, are driving demand for CPVC and UPVC pipes. These pipes are being used for large-scale water distribution networks and sewage systems due to their strength and durability.


Conclusion

Installing UPVC pipe fittings is a straightforward process that, when done correctly, can ensure a reliable and leak-free plumbing system. By following this step-by-step guide and using the right tools and materials, both DIY enthusiasts and professionals can achieve a successful installation that lasts for years. Proper care and maintenance after installation will further prolong the life of your UPVC piping system.

Request a Free Consultation

Get personalized plumbing solutions with a free consultation from Fitwell.